

Creating performant and dense foliage for Endzone – A World Apart from Kai Mergener – Material & Environment Artist.
We find vegetation always and everywhere. Even in the merciless parts of dried up desert areas some plants show up and try to survive in the harsh environment. In Endzone – A World Apart, this is not different and must not be. As humans, we expect to discover plants and other natural elements in a believable and lively scene. Vegetation for video games, however, is a topic that discusses almost daily new methods of creation and is probably one of the most variable processes in the development of assets for games. As a player, you want to find many and different kinds of plants in a game. As a developer, on the other hand, the problems to implement these increase with the amount and density of assets as soon as optimization and performance is required.
Why foliage is something special
The development of video games is a constant balancing act. Assets always need to meet the specifications for performance and presentation, but also be visually appealing and capable of being integrated into the overall concept.
Developers have always been confronted with the challenge of integrating content with high performance so that games run smoothly even on weak hardware.
Particularly relevant is the vertex count of individual models, which in an entire scene rendered by the camera can easily run into millions, as well as the quantity and size of the associated textures.
Simply baking down higher detail onto a simpler mesh is not always possible for foliage and needs a lot more preparation. For example, if a game is to contain grass, two problems arise immediately. Firstly, the amount of blades of grass that need to be rendered would cause the entire vertex count to rise quickly to dizzying heights. Furthermore, variation can mainly be achieved by using a lot of different textures. So again, the barrel will quickly overflow.
Requirements & Advantages
Before we could start to create vegetation for Endzone, the context in which the plant will be seen had to be clarified. This inevitably resulted in limitations to work with but also possible advantages that may facilitate the work process in the long run. Endzone is based, like many other RTS games, on a grid. Since we aim for a highly performant distribution of plants, we ideally only want one mesh to be used per cell. This only applies for the specific case of plants that are used on cultivable fields in Endzone. Therefore following aspects crystallized out that a plant mesh has to fulfil:
Requirements:
- Each mesh may have a maximum vertex count of 180.
- Textures are resized to a maximum of 512 x 512 pixels and therefore have to be created in such a way that details are still noticeable at lower resolutions.
- Each plant shall be clearly distinguishable visually from other types.
- A high visual density must be achieved.
Advantages:
- Plants are always viewed from a certain distance, so that much detail is inevitably lost and not too much time has to be spent on the mesh during creation but on the texture itself.
- Wind is generally controlled by a shader, and therefore no animations need to be considered in advance.
- Due to the position of the camera, the player cannot look at a mesh from completely above. Card meshes are therefore less conspicuous and can be used more confidently.
What will be the use case for the specific asset?
Within Endzone, the points mentioned above differ again depending on the use case. It is essential to clarify the general conditions at an early stage. For trees, shrubs and grass, we each use a completely different approach.
It was especially important to us that a large number of plants can be shown at the same time. Especially in the case of, for example, wheat or corn the credibility is not given if only occasionally a plant can be found. In addition, the player sees the plant from a variety of angles through the preset perspective, which is why the plant needs to have a very homogeneous density anyway.
Using Megascans to create textures
The Quixel library was often used to create the vegetation in the game. Scanned assets have an outstanding quality, but are always accompanied by advantages and disadvantages. In contrast to a procedural workflow, we are limited in our variability when using scans. For Endzone, however, we could mainly use the advantages for us. Through a later iteration inside Substance Designer, we are not limited too much anymore from static textures.
Since we aim to use only one mesh per cell for the fields in Endzone, several variations of a plant had to be baked onto a single texture. This way, we can keep the vertex count low and counteract the repetition that comes from spawning the same mesh over and over.
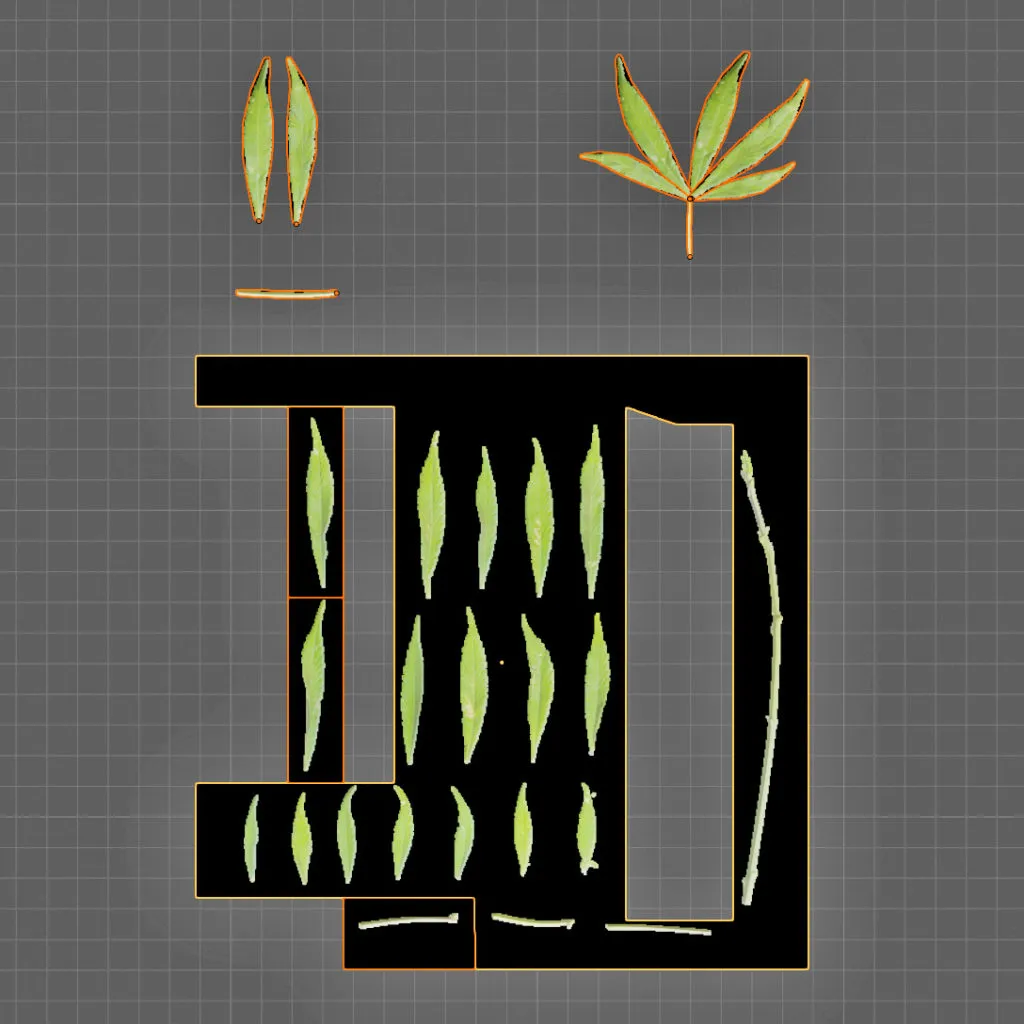
The scans are first imported into Blender where we set up a shader to correctly display the textures. Leaves and branches are cut out of the atlases and used as individual meshes. Now a little manual work comes into play. With the help of modifiers, generators and a little manual shifting and adjusting, several variations of a plant are now created. So far, the creation is barely different from known processes or what you would call “state of the art”.
Creating the base mesh in Blender
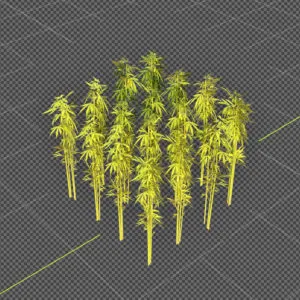
In Endzone, the player can choose from a variety of seeds that are cultivated on a field that can be harvested by farmers. For each cell, a single mesh is spawned, which at best does not consist of only a single plant. Otherwise, a complete field would only have as many plants as there are cells. Experience shows that 16 visually displayed plants per cell give the best result. A cell is 2m² in size.
To achieve this, we first search through Megascans for suitable plants for further processing. In this particular example, we wanted to create a hemp plant. Fortunately, there are some atlases from Quixel which are ideally suited for this purpose. Sometimes we even use custom scans or make use of a complete procedural workflow that will not be further discussed here.
For this particular workflow we need an albedo, normal, roughness and opacity map, each with a resolution of 4K. Lowering the resolution of textures later on in Unity guarantees a higher level of detail, therefore we use the best possible quality and reduce it afterwards.
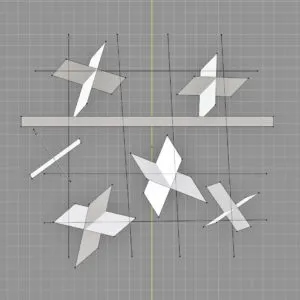
The textures are now imported into Blender by creating a simple canvas with a quad and assigning it a material with the imported textures. By setting loop cuts, individual parts of the atlas are now separated manually from the quad to be treated as separate mesh.
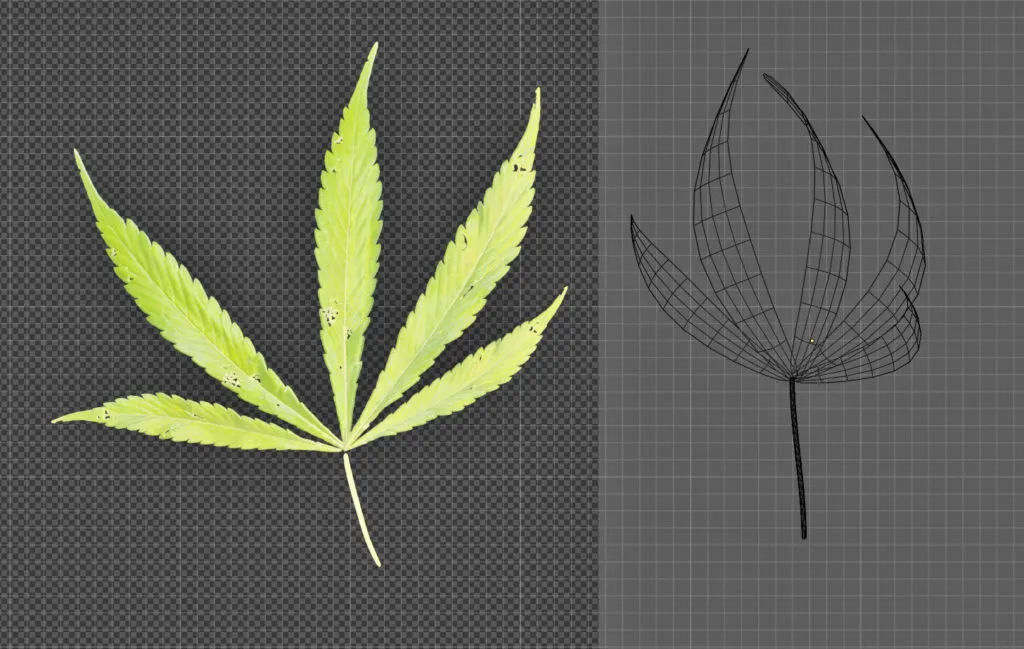
Starting with a single face, each leaf and branch is further subdivided individually, adapted to the shape and slightly twisted, bent and shifted to achieve a natural shape.
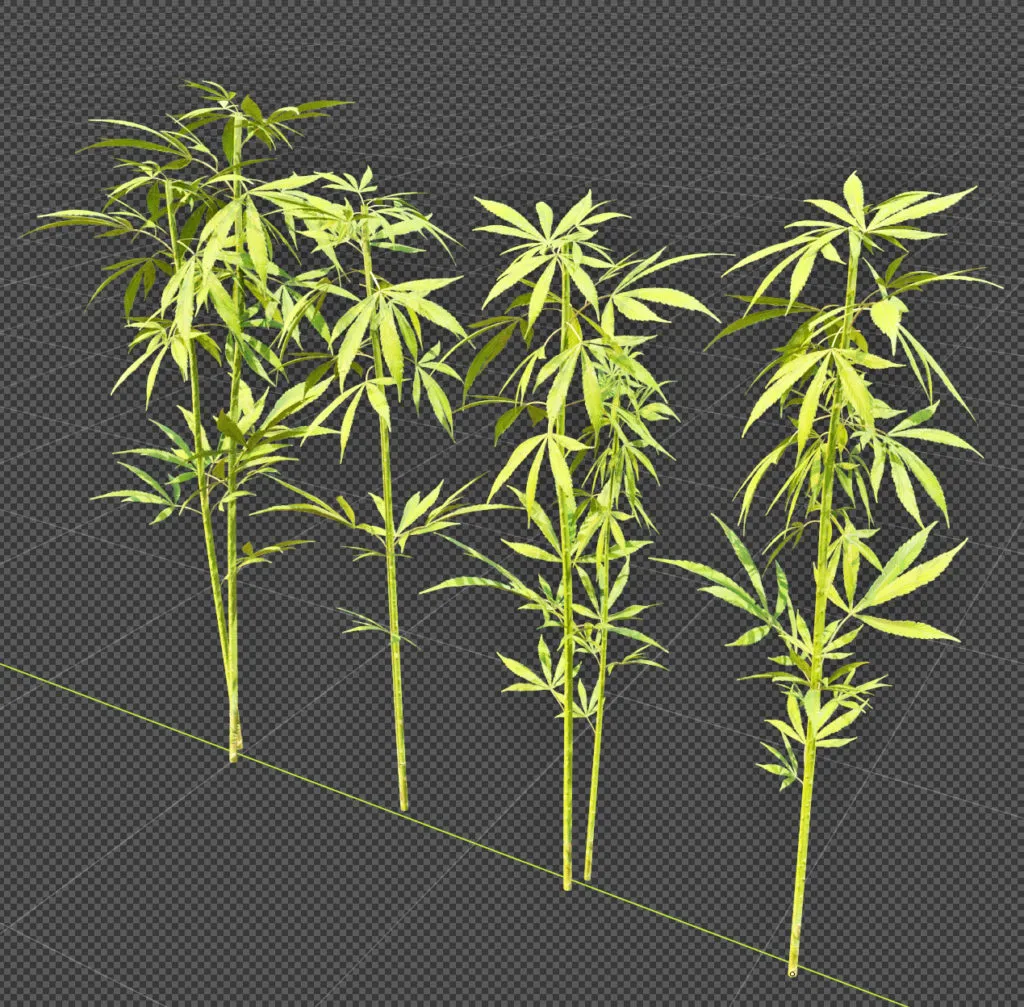
There are no special rules in this step; what matters is the result. Before a mesh is imported into the game engine, you are not limited in how high the quality or density of the geometry has to be: the higher, the better. After a few iterations, we now have some variations of a hemp plant available as a high resolution mesh to then create the required textures. We now align a few meshes on the same axis with even space between each other.
For rendering, an orthographic camera is created and placed so that all plants are enclosed in a square format. Now, by placing a sun as a light source or adding an HDRI, we create a setting in which the plant can cast shadows on itself. Usually it is untypical to have highlights or shadows baked into the albedo. You ideally always want to go for completely neutral lighting. In our case, we prevent using more geometry in the mesh for a physically correct illumination in the engine by already faking shadowcasting into the texture.
Using Substance Designer for a semi-procedural approach
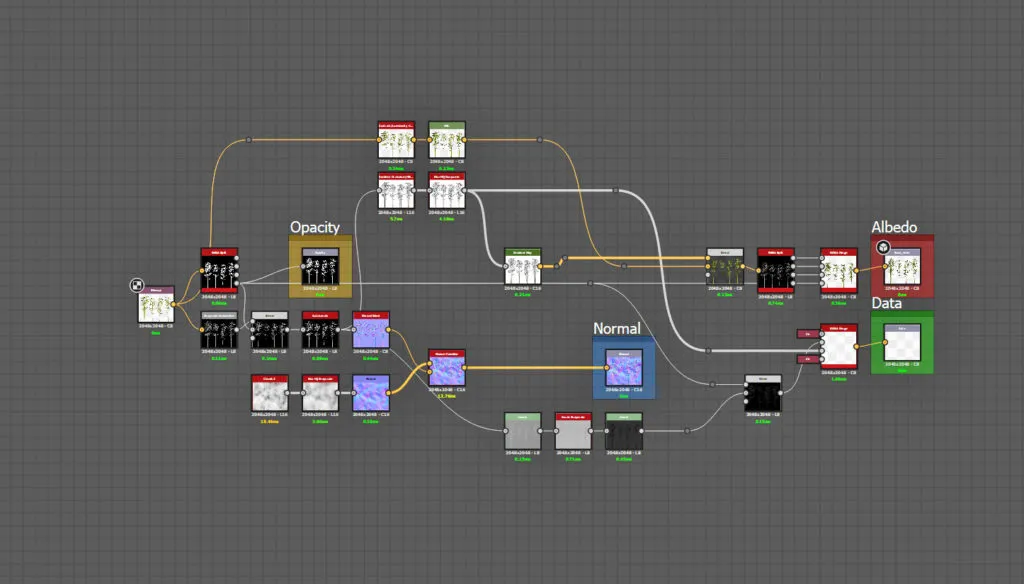
Since scans are inherently not very customizable, the rendered texture is imported into Substance Designer. There we use a simple graph, which only needs to be slightly adjusted for different applications and plants.
From the individual channels of the rendered texture, we now generate a normal map, as well as roughness and ambient occlusion. Some minor adjustments help us to change the maps as they are needed in the game. Usually a normal map is generated from an underlying heightmap, or baked directly from the high poly mesh. In our special case, however, we have to guarantee that some details are still visible at a high distance, which is why a conventional normal map would not be suitable. Instead, a high-contrast normal is generated directly from a matching channel of the albedo. Even if it is not accurate, it works wonderfully after lowering the resolution in Unity and can be adjusted quickly at any time. However, this can occasionally lead to weird behaviour, which is why we have to fix the normals manually in the shader afterwards. The albedo is also adjusted by various filters so that changes can be made at any time in an entirely procedural way. Finally, we always mix the generated ambient occlusion directly into the albedo to create additional depth. Since our shader within Unity needs the textures in a special format, they are repacked within Designer and then exported back to Blender.
Designing the performant mesh
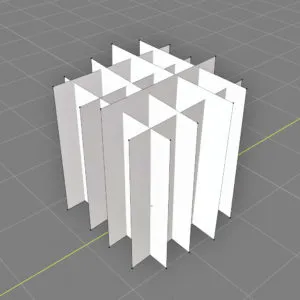
From the generated textures, the mesh of the hemp plant can now be created. For field plants, we only use cards. Otherwise, the vertex count budget cannot be met. First of all, we create new material and fill it with the just generated textures as done before with the scans. The cards are now arranged in a 4 x 4 grid so that a crossplane is created at the respective places. Through this step, we save 75% of the usual vertices because not every plant has to consist of a single crossplane mesh, each consisting of 8 vertices. By using this method, we know that the finished mesh has exactly 64 vertices (32 if it didn’t have to be double-sided).
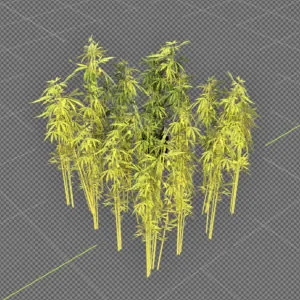
With 116 vertices left to use, single cut plants from the texture are now used to build a different crossplane mesh. This will now supplement the overall mesh by individually placing it in the gaps. This way, we not only break the grid look but can also fill the free spaces.
If the result is satisfactory, textures and mesh are imported into Unity. Now that all technical requirements are fulfilled, the decisive factor is whether the visual presentation is appealing and whether the textures still work after reducing their resolution. If the result is not as expected, we can now jump back to the corresponding point in the creation at any time due to the modular structure and make changes quickly.
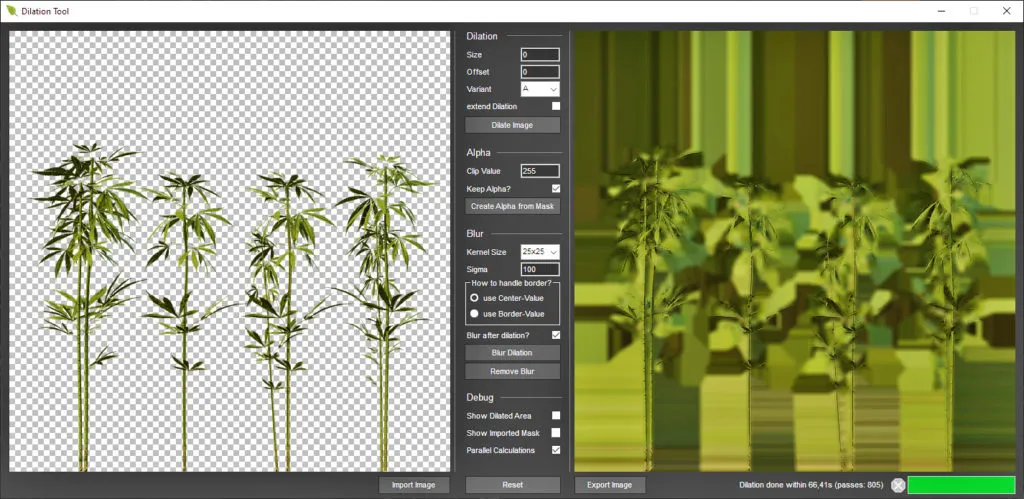
“Dilate it, baby”
Often underestimated is the importance of properly dilating a texture that works with transparency or cutout. Without this step, unwanted artefacts would quickly show up, especially in our system. For this purpose, we have developed our own tool that quickly dilates the imported texture according to adjustable settings.
Good to know ”Correct” is not always correct
As already described by Wes McDermott “Physically Based Rendering (PBR) is a methodology rather than a hard standard” (“THE PBR GUIDE – PART 2, 2018, available from: https://www.adobe.com/learn/substance-3d-designer/web/the-pbr-guide-part-2”).
Even if in many steps a texture no longer has the state described by the theory as “optimal”, it can still be used in specific applications and, depending on the needs, does not have to be created according to the standards described for creating foliage.
Only the result counts
While the created asset must meet the technical limitations, no workflow can be enforced if the result is not satisfactory. As long as we are pleased with the visual presentation, the goal was achieved. If the described or defined method does not achieve an optimal result, adjustments must be made. Hardly any plant in Endzone has been fully implemented following exactly the steps described above. In the best case, however, we can fall back on this workflow and make use of it most of the time.
Constant variation and further development of the underlying process is a normal procedure and should be considered at any time as long as the factors time and effort in the development are sufficiently available.
Performance is variable
Not every game has the same requirements. Endzone uses a modified version of Unity’s legacy deferred rendering. Therefore we cannot display transparency in a performant way and have to use cutout/alpha test to visually cut plants out of the mesh. Since we don’t use transparency at all and therefore have minimum overdraw for the foliage, we can keep the vertex count low and use quads to render foliage instead of meshes that tightly align with the alpha channel. This is one of the few ways we can reduce render times.
However, as already mentioned, this only applies to the Endzone use case and may well be different in other games.